Geozones
Geozone — a polygon-shaped area with an arbitrary number and position of vertices. A geozone differs from a landmark in the form and method of setting it, as well as in the absence of the ability to assign coordinate sources. Thus, geofences can track the intersection of complex-shaped perimeter objects, but they cannot move in space.
Viewing geozones
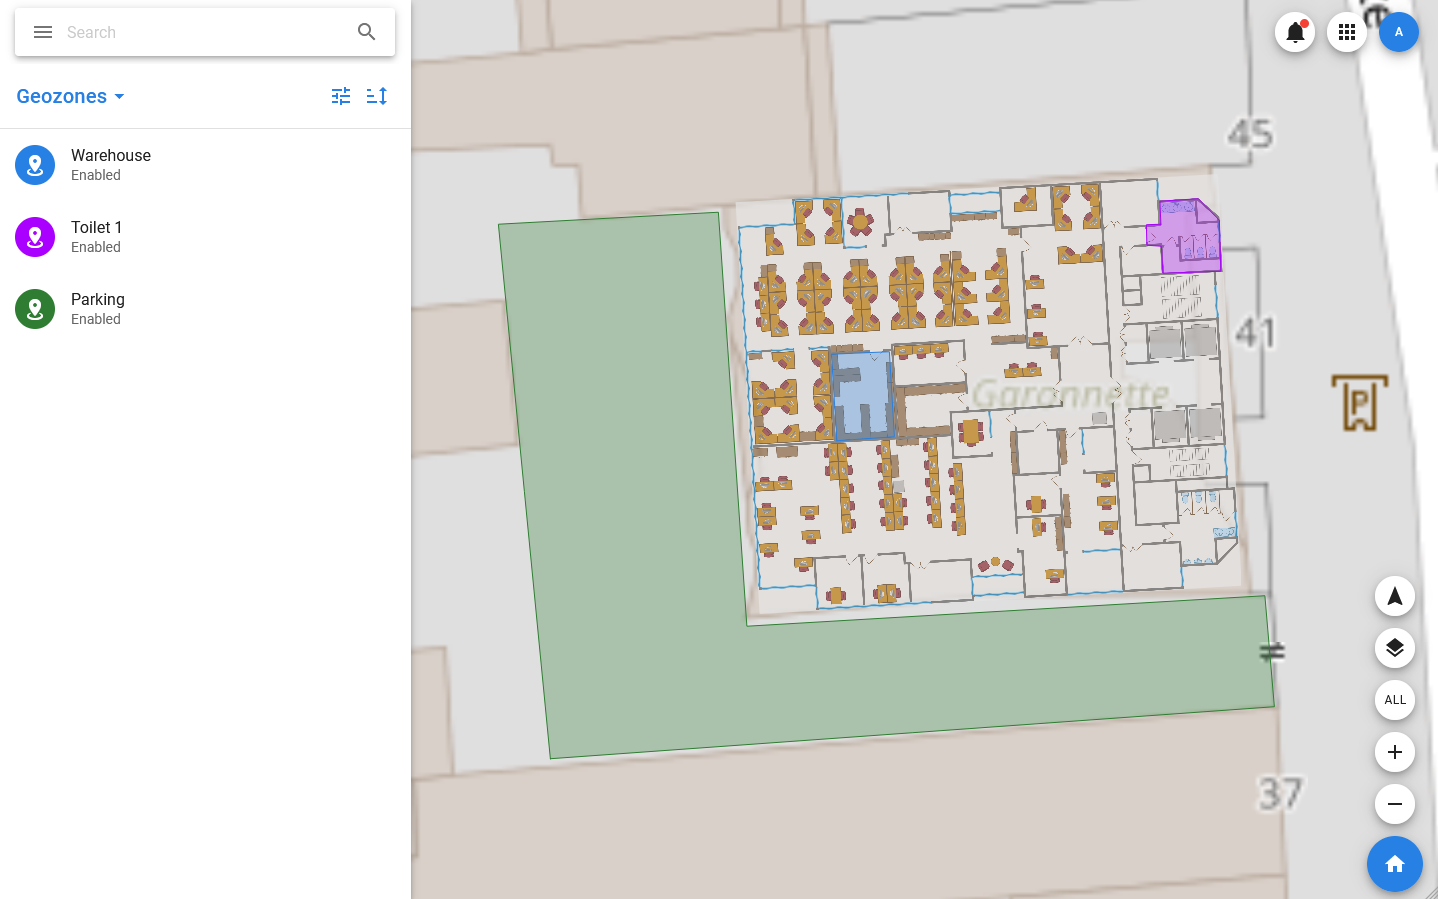
Geozones are displayed in the list and on the map when you select the same item in the menu. On the map, geozones are displayed as polygons of the specified colors. The list displays the geozone avatar, whose color also corresponds to the assigned color, name, status, and area. Also, the status bar contains icons corresponding to disabled notifications and favorites.
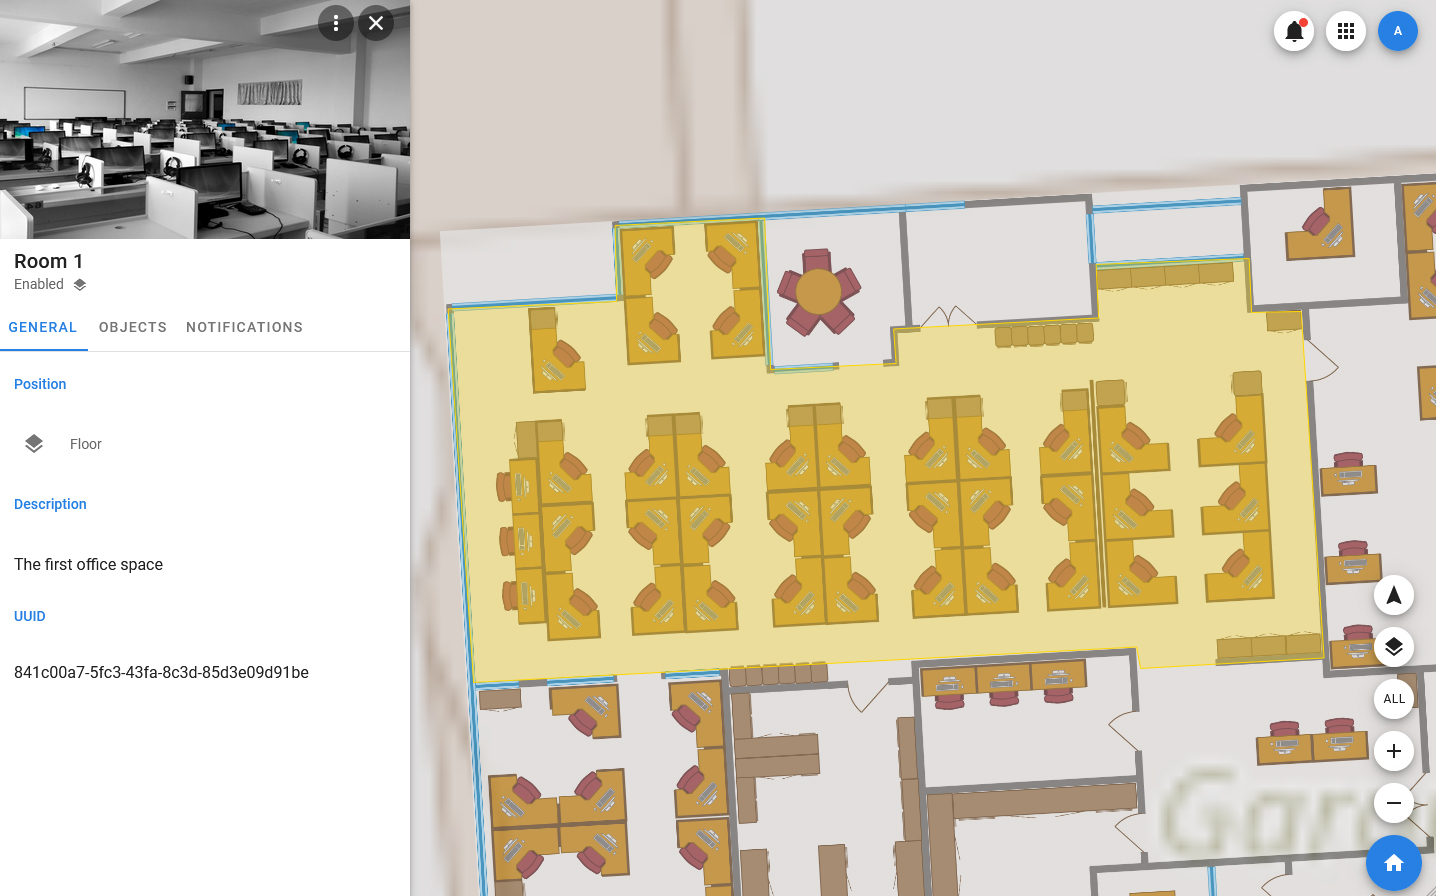
More detailed information about the geozone is displayed in the card. It includes an image, an avatar, a title, a set of statuses, and a set of tabs that include:
- GENERAL — basic information about the geozone, it includes the coordinates of the center, the address of the center, height, geotag, description and ID.
- OBJECTS — a list of objects included in the geozone.
- MEDIA — media files related to the geozone. Work with them is carried out in the same way as in the object.
- NOTIFICATIONS — this tab displays all notifications associated with this geozone (sent by both the system and users).
- ACCESS — a tab that displays information about access rights.
Managing geozones
Geozones are primarily designed to track the geographical position of objects (their approach and distance from certain zones on the map), but they also have additional functionality. The geozone can be linked to room plans displayed on top of the map, and images that simplify the relationship between real objects and objects on the map.
Creating a geozone
To create a geozone, you must:
- Open the list of geozones, select Geozones in the toolbar of the list > Add new.
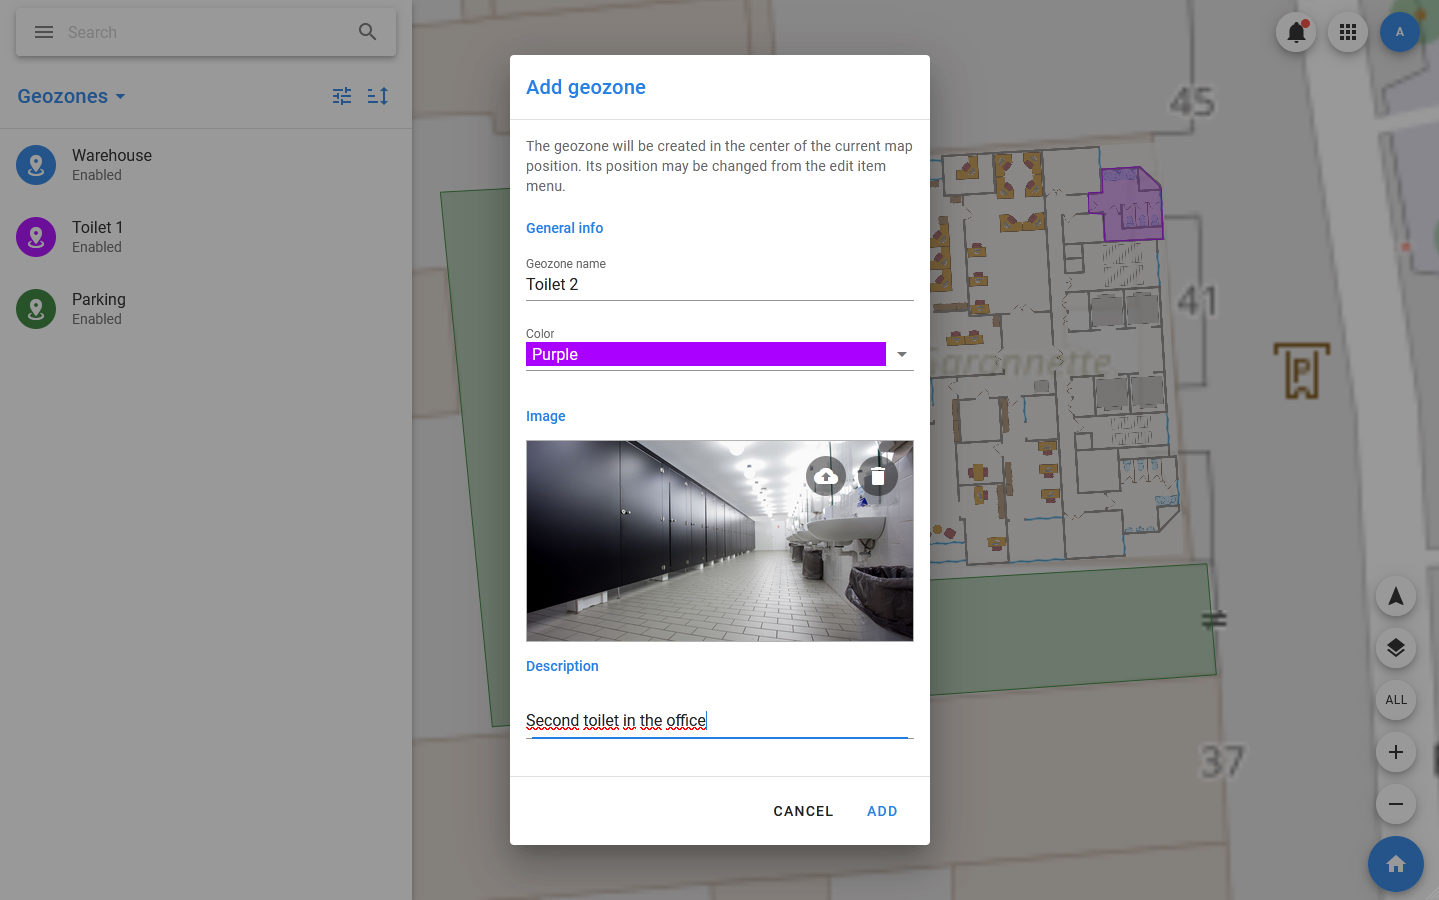
- In the modal window that opens, specify the name of the geozone under which it will be displayed in the list.
- Select the color of the geozone — it is used to display it in the list and on the map.
- Select the geotag where the geozone should be located.
- Upload an image of the geozone that will be used as the cover of the card.
- Click ADD.
After that, the geozone card should open, and the geozone itself should be displayed on the map. The geozone is created in the current center of the map and by default has the shape of a square. Change its shape and position using the Move method.
Editing a geozone
The following actions are available for the geozone:
- Edit — edit basic information about the geozone: name, color, description, card cover.
- Change access — change access rights to the geozone.
- Mute — disable notifications from the geozone.
- Set disable / Set enable — sets the value of the Enable / Disable flag. If the geozone gets the Disable flag, then object occurrences are no longer calculated for it.
- Move — move the geozone on the map and change its shape.
- Send notification — send a notification linked to the landmark.
- Show history — show the history.
- Download notifications — download notifications.
- Copy UUID — copy the unique identifier of the geozone.
- Delete — delete the geozone.
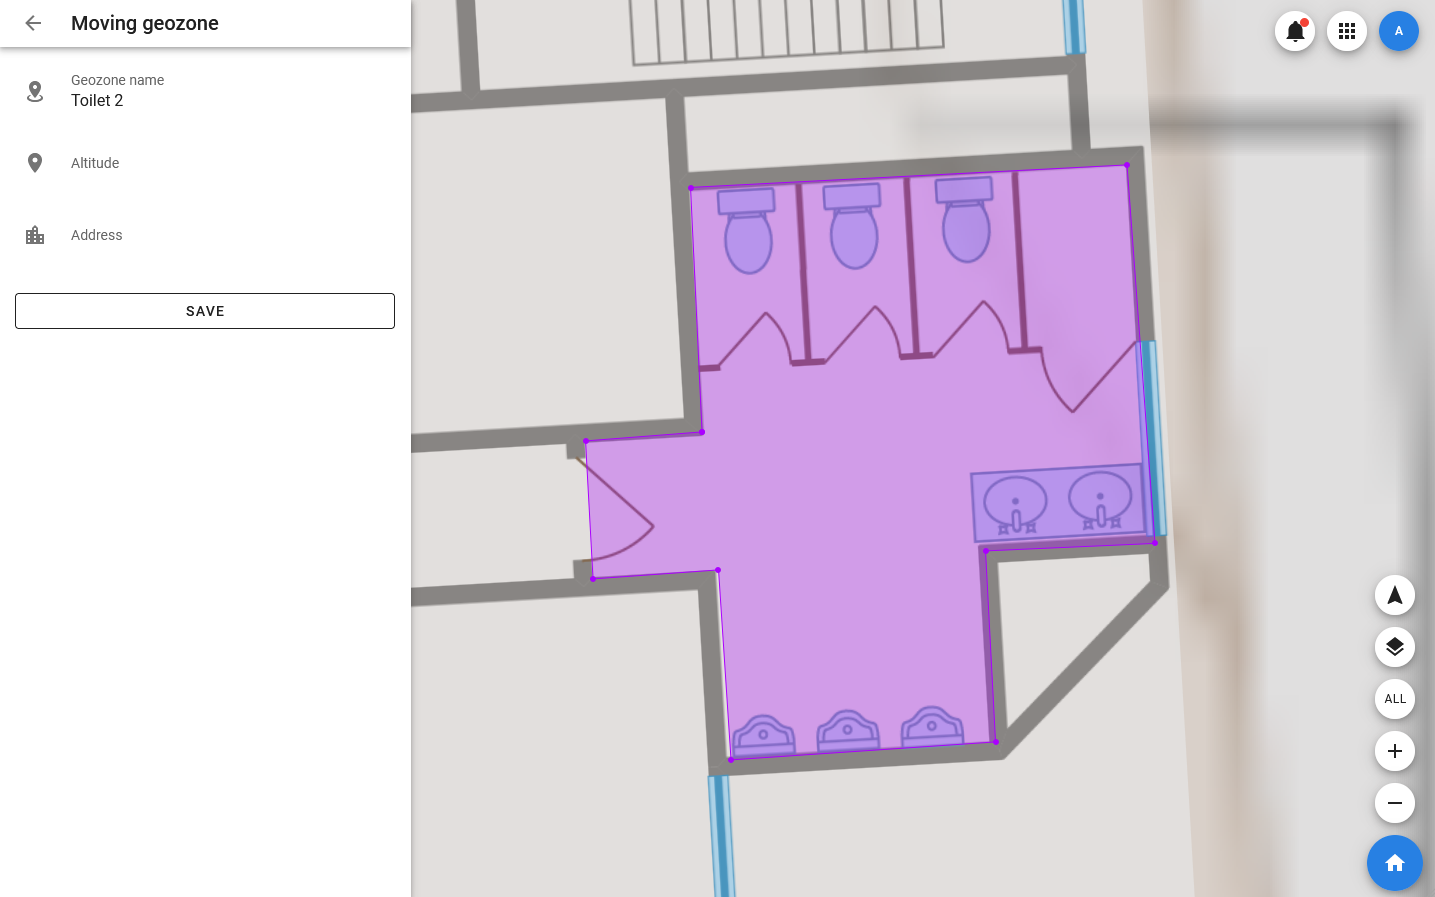
Setting the position and shape of the geozone takes place in visual mode: to do this, select Move in the context menu of the geozone. Editing is carried out according to the following principle:
- Any existing point (indicated by a white square) can be moved, while all other points remain in their previous positions.
- A new point can be added to an edge between two existing points — the positions where points can be created are indicated by semi-transparent squares. To create a point, click on the selected position. After that, the square will turn white, and the point can be moved.
Changes are saved when the SAVE button is clicked.